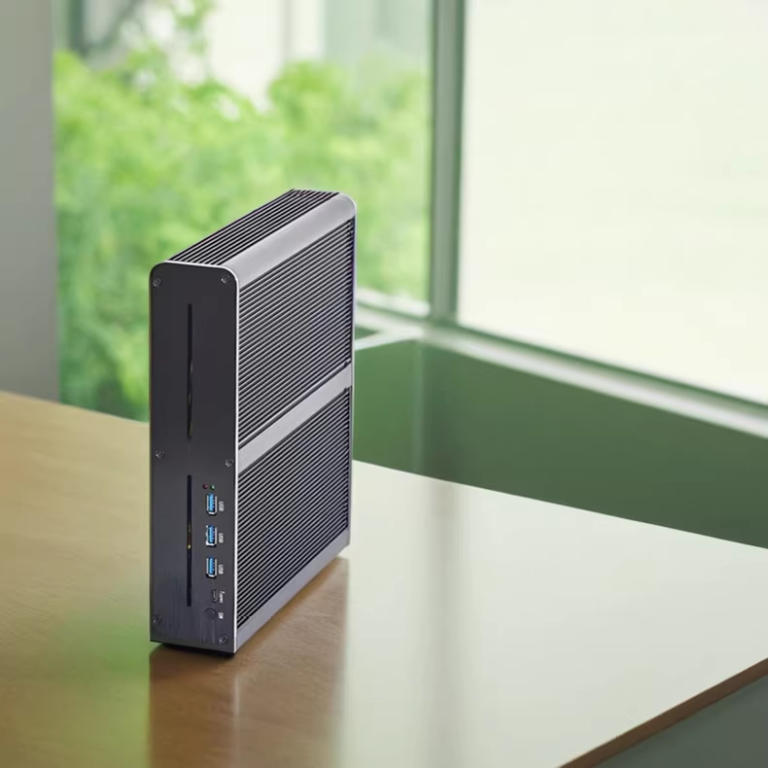
Transforming a mini PC into a Network Attached Storage (NAS) offers a cost-effective and flexible way to manage data. This article explores how to assess a mini PC’s suitability for conversion into a NAS, select the right software, set up the system, and enhance its capabilities.
Assess Your Mini PC for NAS
| Component | Requirement |
|---|---|
| Processor (CPU) | Multi-core processor (e.g., Intel i3/i5/i7, AMD Ryzen) |
| Memory (RAM) | Minimum 4GB, 8GB or more recommended |
| Storage | Support for multiple large-capacity hard drives; RAID configurations |
| Network Connectivity | Gigabit Ethernet connection preferred |
| Power Supply and Cooling | Reliable power supply and adequate cooling |
Refer to the detailed analysis of Mini PC requirements for NAS:
Processor (CPU)
A multi-core processor should be chosen for the running NAS setup. Powerful processors, such as Intel i3, i5, i7 series, or AMD Ryzen, have a multi-core facility, enabling heavy workflows managed by several simultaneous tasks and user requests when your NAS is put into some data-intensive jobs, such as large file transfers or many streaming requests occurring parallel. The CPU should be robust enough to support the operating system of the NAS, run applications, and manage the overhead of disk I/O without becoming the performance bottleneck.
Memory (RAM)
RAM is one of the most important components determining how well your NAS copes under load. While the minimum requirements may be as low as 4GB, it is thus recommended that at least 8GB run more resource-intensive applications, such as the media servers running Plex or virtualization environments, for running several services on the same hardware. More RAM helps cache frequently accessed data, thereby reducing load on hard drives and speeding up response times for connected users.
Storage
Integral to any NAS is storage and its reliability. Your mini PC should support at least one or more large capacity hard drives that are used to store data. The utilization of RAID configurations such as RAID 1 for mirroring, or RAID 5 for striped with parity, enhances data integrity and redundancy against the loss of data caused by a single drive failure. If there are only a couple of SATA ports on the mini PC available for internal drives, you may want to use external storage options like USB 3.0 drives. These can also be configured as a RAID array using the right enclosures and adapters.
Network Connectivity
In NAS, a Gigabit Ethernet connection is very important; this is what provides the bandwidth to transfer large files across the network fast. If the mini PC was only Wi-Fi, then the addition of wired Ethernet is recommended since the Wi-Fi can get less reliable and slower, which may impact the performance of your NAS when multiple users are accessing the device simultaneously .
Power Supply and Cooling
Performance and longevity require a good power supply and cooling system in the mini PC. Due to the fact that most NAS devices are designed to run 24/7, thermal throttling because of poor cooling can bring down performance or even damage hardware. Check if the cooling solution of the mini PC is able to manage the resulting heat output under load and consider upgrading at least fans or adding additional cooling if necessary.
Choose the Right NAS Software
NAS software transforms a mini PC into a robust storage solution. Here are a few popular options:
| NAS Software | Pros | Cons |
| TrueNAS (formerly FreeNAS) | Comprehensive features like snapshots, replication, ZFS file system. Supports many plugins. | Requires more powerful hardware due to ZFS. Complex interface may be daunting for beginners. |
| OpenMediaVault | User-friendly interface, supports many plugins without overwhelming users. | Lacks some advanced features like ZFS, which may affect data protection. |
| unRAID | Allows mixing drive sizes, supports Docker and virtual machines for versatile storage solutions. | Commercial product with costs post-trial. May not suit those seeking free solutions. |
| Ubuntu Server with Samba | Highly customizable, extensive community support for troubleshooting. | Demands high technical skill for setup and maintenance. Requires hands-on management for security. |
For newcomers and those seeking a balanced option, OpenMediaVault stands out as it offers a good mix of ease of use and powerful features without the steep hardware or knowledge requirements of more complex systems like TrueNAS or Ubuntu Server with Samba.
Set Up Your Mini PC as a NAS
Prepare Your Hardware
Before software installation, ensure your hardware is optimized for NAS functionality:
- Additional Drives: If the mini PC has very limited internal storage, consider expanding it by installing larger or additional hard drives. In cases where internal expansion is impossible, even external drives connected via high-speed interfaces like USB 3.0 or eSATA can be good options.
- Network Connection: Use a Gigabit Ethernet cable to connect the mini PC directly to your router. Bypassing this with Wi-Fi, instability, and limits of bandwidth provide consistent and fast rates of data transfer that are really effective for NAS usage.
Install NAS Software
The installation of NAS software is a critical step:
- Create a Bootable USB: Download the selected NAS software, OpenMediaVault or TrueNAS. Then, with a tool such as Rufus or Etcher, load this software onto a USB drive so it will be bootable and become an installer of this NAS operating system.
- Boot and Install: Insert the bootable USB into your mini PC and enter BIOS settings to boot from the USB drive. Follow the on-screen prompts to install the NAS operating system onto the primary storage drive of the mini PC.
Initial Configuration
Once the software is installed, perform the initial system setup:
- Web Interface Access: Open a browser on another computer attached to the same network and type in the IP address of the NAS system. This opens the management interface for NAS.
- Configure Storage and Network: Set up storage by creating RAID configurations if supported and needed. Then, set up network shares and permissions to determine how users can access the data stored.
- Activate Services: Based on your requirement, enable helpful NAS services such as media streaming through Plex, automatic backups, or other cloud services that can give even more functionality to your storage solution.
Enhance Your NAS
Data protection is paramount
- RAID Configurations: Set up RAID to ensure data redundancy. Options like RAID 1 or RAID 5 offer a balance between storage efficiency and data safety.
- Scheduled Backups: Regularly schedule backups to both local and cloud storage to protect against data loss. Automating this process can ensure backups are performed consistently without manual intervention.
Protect your data and network
- Firewall Implementation: A robust firewall can protect the NAS from unauthorized access and network threats. Configuring the firewall specifically for NAS use can significantly enhance security.
- Software Updates: Regular updates to the NAS software can protect against vulnerabilities and bugs. Keep the system secure by applying updates as soon as they are available.
- Strong Passwords: Use complex and unique passwords for all NAS accounts and services. Consider using a password manager to generate and store secure passwords.
Expand the functionality of your NAS
- Media Streaming: Install applications like Plex to turn your NAS into a media server, streaming video and music to compatible devices across your network.
- Virtualization: Use virtualization tools to run other operating systems and services on your NAS, maximizing the utility of your hardware without impacting the primary NAS functions.
Pros and Cons of Using a Mini PC as a NAS
Pros
- Affordable: Generally speaking, using a mini PC for a NAS is much more budget-friendly than purchasing hardware made for NAS purposes. That goes without saying, especially when older equipment can be repurposed.
- Customizable: It allows users to personalize hardware and software setup to suit their exact needs and preference when it comes to a mini PC NAS setup.
- Multifaceted: Besides just serving to store files, an Mini PC NAS can also be employed for many other uses, such as a home server, a media center, or even a development environment.
Cons
- Power Consumption: A mini PC would generally use more power than purpose-built NAS units designed with energy efficiency in mind.
- Noisy and Hot: This is an outstanding thing about mini-PCs; they may get loud and hot, especially the older ones or those with poor cooling solutions, which can disturb an efficient working environment at home.
- Reliability: While convenient, mini PCs are not designed for continuous operational demands as would be expected from a NAS. Because of this, they tend to result in more frequent needs for either maintenance or replacement compared to using dedicated NAS solutions.
Summary
Using a mini PC as a NAS can be a practical solution for those seeking to repurpose existing hardware into a powerful storage server. While there are trade-offs in power efficiency and durability, the advantages of cost, customization, and versatility make it a worthwhile consideration for tech enthusiasts and small businesses aiming to optimize their data management strategies.


